What Are Cat Eye Nails?
When I first tried the cat eye effect, I was surprised by how a simple swipe of a magnet could create such a mesmerizing reflective line on the nail. Cat eye nails use a magnetic UV gel polish filled with tiny metallic particles. While the polish is still wet, I hold a magnet close to the surface so the particles shift and form a multidimensional line that mimics the slit of a cat’s eye. The illusion of depth, movement and shifting light is what makes this nail art technique so captivating.
Depending on how I position the magnet, I can create a classic streak, a three dimensional shine, a diagonal cat eye, a galaxy effect with irregular reflections or even small shapes like hearts, stars or paw print accents. Magnetic French tips are another variation when I want a subtle glow at the nail edge. No matter which version I create, the combination of metallic particles and a magnet always gives the nails a unique, dynamic finish.
Why Magnetic Gel Is Perfect for the Cat Eye Effect?
When I work with cat eye nails, UV gel polish always gives me the most reliable results. The thickness of the gel holds the metallic particles in place, so when I bring the magnet close, the reflective line forms sharply and stays exactly where I want it.
What I appreciate most is the durability. After curing under a UV or LED lamp, the shine stays glossy for weeks without chipping or fading. The smooth finish enhances the depth and movement of the magnetic particles, which makes the cat eye effect look more defined.
I switch between dark and translucent bases depending on the look. Dark shades like deep greens or purples make the line bold and dramatic, while jelly or sheer colors give a softer glow that feels more delicate. Both work beautifully and give me different levels of intensity and depth.
Essential Tools You Need for Cat Eye Nails
When I set up for a cat eye manicure, I like keeping a simple toolkit that makes the whole process smooth and predictable. These few items are all you really need to create a clean reflective line and control the metallic particles properly.
Magnetic Gel Polish
The main product is magnetic gel polish enriched with tiny metallic particles. This is what reacts to the magnet and forms the shifting reflective line, wave pattern or multidimensional shimmer. I always check the consistency before starting because a well balanced gel makes the effect sharper.
Magnets for Shaping the Effect
I keep a few magnet shapes on my desk because each one manipulates the particles differently:
- Rectangular magnet for classic streaks and strong directional lines
- Circular magnet for perfect circles, framed looks or soft glow patterns
- Multi shape magnets for diagonal, galaxy effects or tiny accents like hearts and paw print designs
Having options makes it much easier to create variations without switching products.
UV or LED Lamp
A UV or LED lamp is essential because magnetic gel needs proper curing to lock the particles in place. Once cured, the design stays sharp and does not move, which is why I always cure right after shaping the line.
Optional Tools for Creative Designs
I like keeping a few extras when I want something more unique.
- Translucent or jelly colors for soft overlays and layered cat eye looks
- 3D gels when I want to add raised accents or build small shapes before applying magnetic effects
These optional products give me more room to experiment and add different depths or textures to the manicure depending on the style I’m aiming for.
How to Get Cat Eye Nails: Step By Step Guide (Beginner Friendly)
When I teach beginners how to create the cat eye effect, I always remind them that the technique looks complicated but becomes simple once you understand the rhythm of prep, polish, magnet and cure.
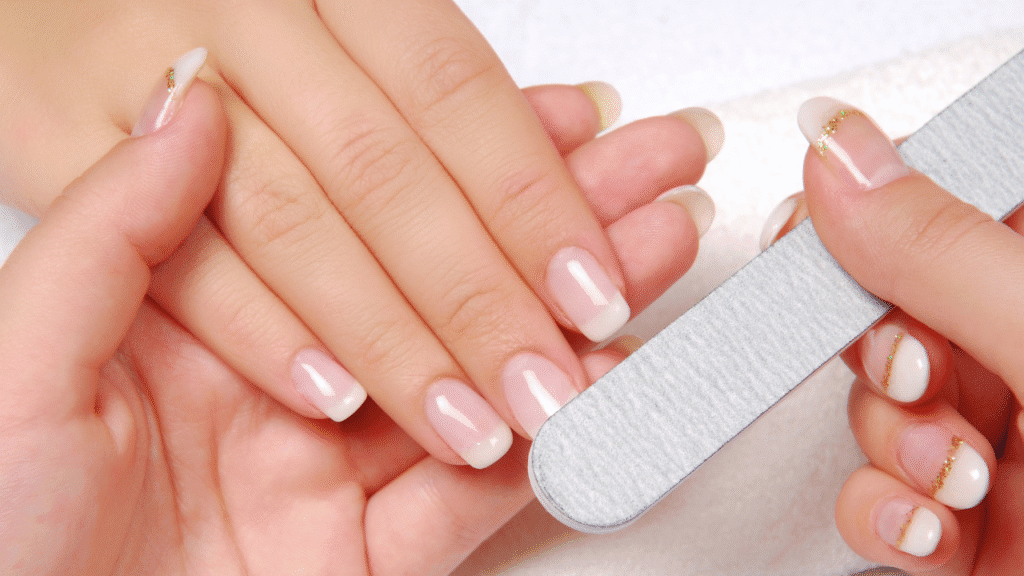
Step 1: Nail Prep
I start by shaping the nails to the desired length, then gently buff the nail plate to remove shine and help the gel adhere. Pushing back the cuticles and wiping the surface with a cleaner removes oils that can interfere with the application. A clean base always leads to a cleaner reflective line later.
Step 2: Apply and Cure the Base Coat
After prepping, I apply a thin layer of UV gel base coat. This creates a smooth foundation and protects the natural nails. I cure it in a UV or LED lamp for about 30 to 60 seconds depending on the lamp strength. Once cured, the surface is ready for the magnetic layer.
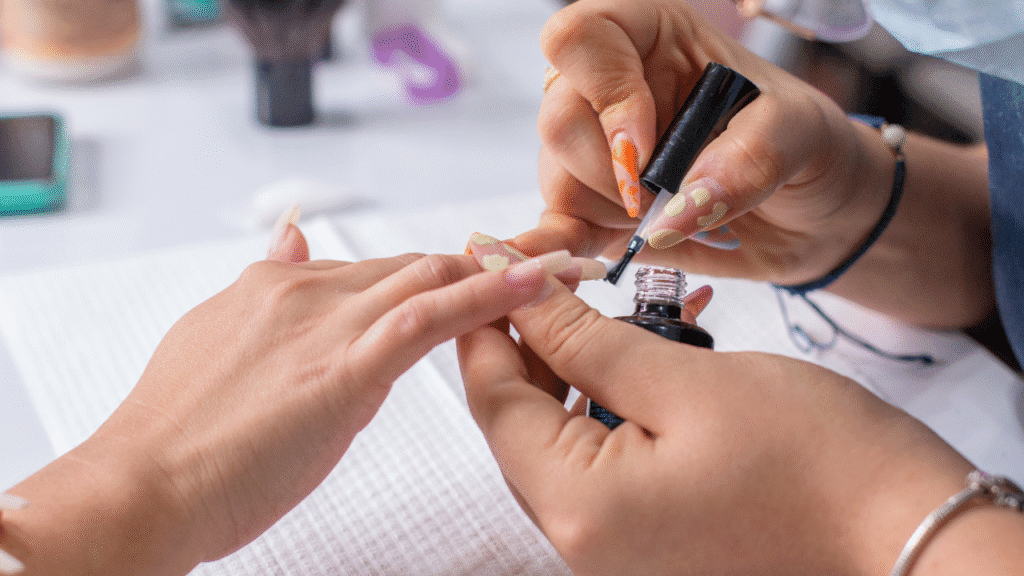
Step 3: Apply the Magnetic Polish
Next, I add the first thin coat of magnetic gel polish. I usually cure this layer to build color evenly, then apply a second, slightly thicker coat. This second coat is the one I shape with the magnet because the metallic particles move more freely in a thicker layer. I make sure not to cure yet.
Step 4: Shape the Effect with the Magnet
This is the part I enjoy the most. Holding the magnet about 3 to 5 millimeters above the nail, I move it slowly to create the pattern I want. The closer the magnet, the sharper the reflective line. If I angle the magnet, I get a deeper multidimensional effect. If I hover too long, the particles continue to shift, so I stop the moment I see the line or shimmer I like. Each movement changes the depth, direction and intensity of the streak.
Step 5: Cure to Lock the Design
As soon as I’m satisfied with the placement of the metallic particles, I cure the nail under the lamp. This freezes the pattern so it stays crisp.
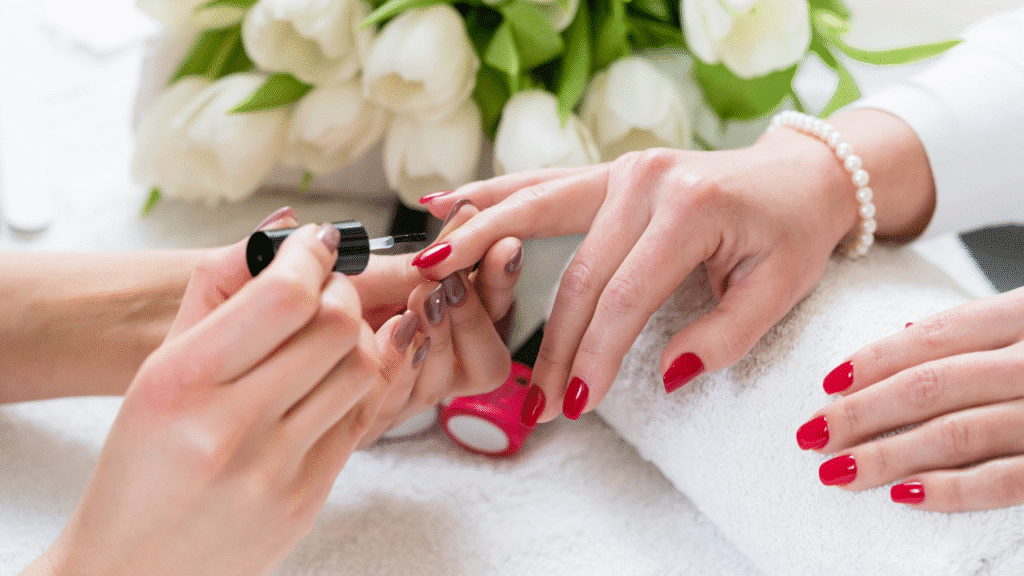
Step 6: Seal with a Top Coat
I finish by applying a glossy top coat to add shine and protect the design. After a final cure, the cat eye nails look smooth, reflective and clean. The top coat also enhances the multidimensional shimmer, which is why I never skip it.
Pro Level Magnetic Designs You Can Create (From Simple to Advanced)
Over the years I’ve tried almost every variation of the cat eye effect, and what I love most is how a small change in magnet placement can transform the entire manicure. Here are the designs I reach for the most, starting from simple techniques and moving into more artistic effects.
Classic Cat Eye Line
This is the look I teach first because it shows the core of the magnetic effect. I hold the magnet straight above the nail so the tiny metallic particles shift into a clear reflective line running through the center. The streak gives the nail a strong illusion of depth and looks elegant on both dark colors and soft translucent shades. It is the most timeless version of the cat eye effect.
Fully Activated Look
This is one of my personal favorites to wear. I use a generous coat of magnetic gel polish and bring the magnet around all four sides of the nail. This pushes the shimmer toward the center and creates a jewel like peek a boo glow across the entire surface. When I sway my fingers, the shimmer moves in a now you see me way that clients immediately fall in love with. This is the look that made many people convert to magnetic gels.
Framed Effect
The framed design looks polished and minimal. I learned to use the circular side of the magnet for this one. I hover it over the middle of the nail, lifting it straight up once the sparkles gather into a soft circle. This leaves the edges slightly darker and creates a natural frame around the nail. It feels chic, delicate and works well with neutral base colors or soft jelly tones.
Magnetic French Tip
When I want a twist on the classic French, I activate the entire magnetic surface first. Then I drag the rectangular magnet downward to form the smile line. I sometimes refine the edge with a round brush dipped in the base color to make the French tip deeper or sharper. This version looks modern, sleek and slightly futuristic, especially when the light streak curves at the tips.
3D Magnetic Accents
For days when I want something bold, I work with 3D gels. I apply a small dollop of texture gel, shape it, and paint over it with magnetic polish. When I move the magnet, the reflective line forms directly on the raised piece, giving the design a lifted gem like finish. I often add sheer colors on top to adjust opacity or create layered tones. These accents stand out beautifully without feeling bulky.
Layered Magnetic Designs
Layering is one of the easiest ways to create artistic looks. I first make a basic cat eye line using a silver or Moon like magnetic gel. After curing, I overlay it with a translucent or glass color. This softens the effect and adds dimension. I repeat the process to build depth, blending metallic shimmer with sheer tones. It is a simple technique that creates sophisticated multi shade designs.
Galaxy, Diagonal and Shaped Effects
These variations are perfect when I want something playful.
- Galaxy effect gives irregular reflections and cosmic depth. I move the magnet in different directions to scatter the shimmer like nebulae.
- Diagonal cat eye tilts the reflective line, giving the nails a modern asymmetrical style.
- Hearts, stars and paw prints are created by tapping or holding the magnet in short motions so the metallic particles gather into small luminous motifs. These tiny highlights look charming for special occasions or themed looks.
All of these designs come from the same concept but create completely different moods. Once you understand how the particles move, you can shape them into almost anything you imagine.
Tips for Perfect Magnetic Application (Must-Know Rules)
When I first started working with magnetic gels, I quickly learned that the technique is just as important as the product itself. A small change in movement or timing can completely transform the final look. These are the rules I rely on every time to get clean, bold, and controlled magnetic effects.
Stir the Magnetic Gel Before Use
Magnetic pigments tend to settle at the bottom of the bottle, and if you apply without mixing, the effect will look weak or uneven. I always stir the gel gently with the brush or roll the bottle between my hands to make sure the pigments are fully activated. This simple prep step brings out the strongest cat-eye or velvet effect.
Work One Nail at a Time
Magnetic gel starts leveling the moment it hits the nail. That is why I focus on one nail at a time. I apply the gel, position the magnet immediately, and cure right away. Working too slowly can cause the magnetic pattern to spread out or fade before curing, so quick, controlled movements keep the design sharp.
Understand Magnet Attract and Repel Behavior
The magnet can either pull the pigment toward the surface or push it away depending on the angle. When I want a bright line or highlight, I bring the magnet closer. If I want a shadow or deeper aura, I tilt or move it slightly away. Learning how the magnet behaves makes it easy to create bold, soft, dramatic, or subtle effects with precision.
Restart Without Curing When Needed
One thing I love about magnetic gel is that you can redo the design as long as it is not cured. If I do not like the pattern, I simply apply a thin swipe of gel to reset the surface and try again. There is no need to remove or file anything. This trick saves time and helps achieve a cleaner final result.
Use the Right Amount of Gel for Bold Effects
For strong cat-eye lines or velvet depth, the amount of gel matters. Too thin and the magnetic pigments won’t move well. Too thick and the gel may wrinkle or shift. I always apply a medium layer that is thick enough to hold the pigment but thin enough to stay smooth. This gives the most striking magnetic payoff without creating bumps or uneven surfaces.
If you master these must-know rules, every magnetic gel design becomes easier, cleaner, and more controlled. Even advanced effects feel simple once you understand how the gel and magnet respond to your movements.
How to Make Cat Eye Nails Last Longer
When I apply cat eye nails for myself or someone else, I always focus on longevity because the reflective line looks its best when the surface stays smooth and glossy. A few simple habits can easily extend how long the multidimensional shimmer stays sharp.
Use Thin, Even Layers
I’ve learned that thin layers are the strongest. When the gel is applied too thick, it can wrinkle or separate during curing. Thin coats cure evenly and keep the magnetic particles locked in place, which helps the reflective line stay clean and defined for weeks.
Avoid Touching the Nails Before Curing
One of the most common mistakes I notice is touching or adjusting the nails right before curing. Even the slightest tap can disrupt the magnetic pattern or leave fingerprints that dull the finish. Once I shape the line with the magnet, I cure immediately so the design stays crisp.
Keep Cuticles Moisturized
Healthy cuticles make the entire manicure look fresher. I apply cuticle oil daily because it prevents dryness, keeps the nail area flexible and protects the glossy surface. When the skin around the nail stays hydrated, the overall shine of the cat eye effect looks brighter and cleaner.
Protect Nails From Detergents and Chemicals
Harsh cleaning agents can dull the glossy finish and weaken the gel structure. I always wear gloves while using detergents or heavy cleaners so the reflective line and shimmer stay intact. This small habit makes a noticeable difference in how long the cat eye effect stays vibrant.
Schedule Regular Touch Ups
As nails grow, the reflective line naturally shifts upward and loses impact. A quick fill or refresh keeps the pattern centered and sharp. Whether I do it at home or visit a technician, these small touch ups maintain the depth, movement and shimmering glow that make cat eye nails stand out.
Frequently Asked Questions
How do nail salons do cat eye nails?
Most salons create cat eye nails by using a magnetic gel polish that contains tiny metal particles. Once the gel is applied, the technician brings a magnet close to the surface, which pulls those particles into a reflective line. This step is what creates the signature shimmering movement that cat eye nails are known for.
Q: Are cat eye nails dip or gel?
Cat eye nails are made with gel because the magnetic pigments need a liquid base to move freely when the magnet is applied. Dip powder does not allow the particles to shift or align, so the cat eye effect cannot form in a dip system.
Q: Are cat eye nails damaging to your nails?
Cat eye nails are generally safe when done with quality products and removed correctly. Choosing reputable gels, doing a quick patch test if you have sensitive skin, and following proper removal steps help keep your natural nails healthy while you enjoy the sparkle.
Q: How to get cat eyes naturally at home?
To create a natural cat eye look at home, start by filling the space between your lashes with eyeliner so the roots appear thicker. Then add a light layer of shadow on the lids to brighten the area and create a smooth, clean base for the rest of your makeup.
Q: Which is better, cat eye or chrome nails?
Cat eye nails have magnetic shimmer that shifts with movement, creating a dynamic reflective line. Chrome nails, on the other hand, give a smooth metallic shine that stays the same from every angle. The better choice depends on whether you prefer motion or a uniform mirror finish.