If you’re someone with short nails, you might think achieving that sleek, gel finish is only for those with long nails. But here’s the good news: with a few tips and the right technique, you can apply gel polish to short nails and get a beautiful, durable result, just like a professional manicure. Whether you keep your nails trimmed for practicality or you’re a nail biter, gel nails can enhance both the appearance and strength of your natural nails at home.
This step-by-step guide will help beginners master the process, and using products like Poly Nail Gel can make the process even easier. While gel manicures are often associated with long, glamorous nails, applying gel on shorter nails is definitely achievable, and with a little patience, you can rock that glossy gel finish with confidence. In this blog, we will discuss essential tips for applying gel polish, as well as the techniques for using poly gel and semi-cured gel wraps to enhance your short nails.
So, let’s dive in and learn how to make your short nails look stunning with gel polish!
Can You Apply Gel Polish on Very Short Nails?
Applying gel polish on short nails is absolutely possible, but it can be a bit challenging. It’s important to take a step back and understand the process, as the usual techniques for longer nails don’t work as well here. But don’t worry! This blog will guide you in the right direction.
You may need some extra care and patience, but with the best proceed steps, you can make it work. While it’s trickier, gel polish gives a little bit of reinforcement to your nails, allowing them to grow and stay long, if that’s your goal.
If you find it tough, remember that you may need a little help, but it’s worth trying because the extra strength gel polish provides is just what you need to protect those shorter nails.
How To Apply Gel on Short Nails (Snappy Answer)
Just be cautious not to use a soft gel or soak-off gel, as they can oxidize and turn brown, which is a total no-no, especially for a paying client or anyone who cares about their nails. I’ve learned this the hard way during my first attempt with gel nails, so be mindful of the type of gel you’re using. One of the easiest methods I swear by is the spill method, where I apply gel and let it slightly seep over the edge of the nail. This helps cap the nail without any complicated steps.
If you’re feeling adventurous, try the Cap in Reverse technique, where you dunk your separate brush into base gel, wipe off most of the product, and apply it upside down to gently cover the tip without worrying about flooding the skin. It’s a great way to avoid mistakes, and I’ve seen the results speak for themselves. After applying, cure the gel, apply top gel for that perfect finish, and you’re done. It’s easy, effective, and gives your short nails the professional look you’ve been aiming for.
Tips for Applying Gel Polish on Short Nails (Elaborate response)
1. Nail Filing for Short Nails
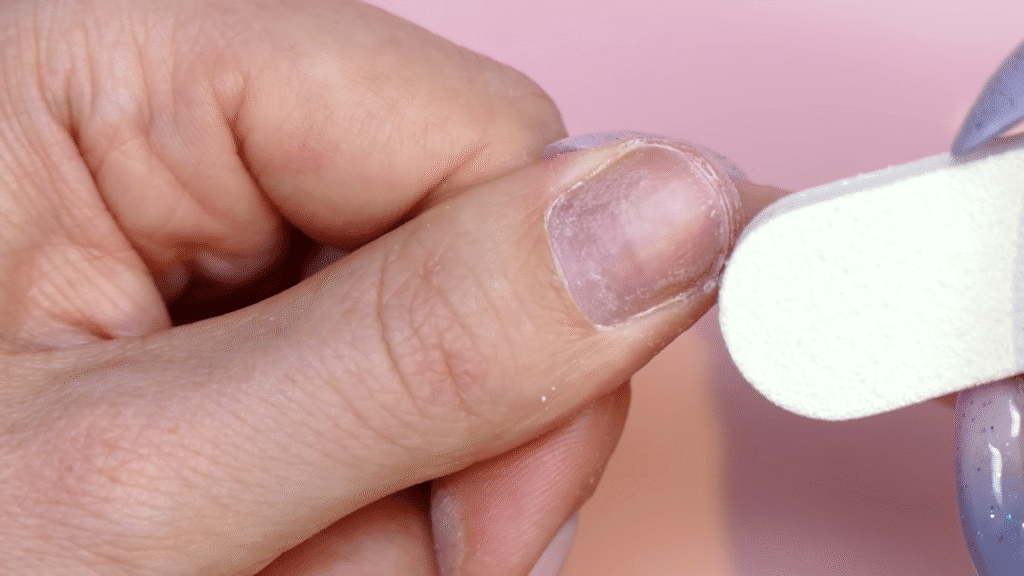
When working with short nails, you might think filing isn’t necessary, but it plays a huge role in ensuring the gel polish stays intact. Start by using a nail file to smooth out any sharp edges or irregularities that could affect the adhesion of the gel. Just a small movement with the file can make a big difference.
2. Cleansing and Prepping
Once your nails are prepped, it’s crucial to cleanse the area. Use Cleaner to get rid of oils from your skin and the nail plate to prevent the gel from lifting. Applying a Prep Booster and a Base Coat before the color ensures the gel polish adheres well and lasts longer. Don’t forget to seal the edges and the tip of your nails with a Top Coat to prevent chipping.
3. Application Process
When you start applying the gel, be careful not to let the polish touch your skin, especially around the fingertip. If the skin is slightly thickened, use your thumb or index finger to pull back the skin and expose the nail more easily. If any gel polish accidentally leaks onto the skin, remove it immediately with a Wood stick or Cuticle Pusher before you cure it under the lamp. Remember, gel polish does not adhere well to sebum or oils on the skin.
4. Thin Layers for Even Coverage
Apply the gel in thin layers to ensure even coverage and a professional look. The process requires practice, patience, and precision to achieve the perfect finish.
How to Apply Semi-Cured Gel Nails to Very Short Nails
1. Choosing the Right Size Wraps for Short Nails
When applying semi-cured gel wraps to short nails, the process requires a bit of attention to detail. Start by choosing the right size of wraps—it’s tempting to go for a larger wrap, but this may cause the wrap to touch the surrounding skin or cuticle, preventing it from adhering properly.
Instead, select a wrap that is just a little smaller than your nail bed, ensuring a snug and comfortable fit that stays in place. If you find the wraps are still a bit too long, use small nail scissors to trim them down to size, ensuring the wrap covers your natural nail without extending past the nail tip. A proper fit will help avoid peel or lift later on.
Read our Types of Gel Polishes guide to choose the best option for your nails.
2. Pressing and Sealing the Edges for Longevity
Once your wraps are the right size, it’s time to press down firmly on the edges to ensure they’re securely attached. This step is important for longevity and helps avoid the wraps from popping off due to a lack of adhesion. A cuticle stick is perfect for ensuring the edges are well-sealed along the bed of the nail.
3. Curing the Gel Thoroughly
To ensure the gel cures thoroughly, apply the wraps in sections under a UV/LED lamp. Take your time to cure each nail individually to make sure they are properly sealed.
4. Moisturizing the Skin Around Your Nails
Don’t forget to moisturize the skin around your nails with cuticle oil or hand cream to prevent dryness and irritation. This is especially important when working with short nails, as the skin around them can be more exposed to the elements.
5. Practice for a Beautiful, Long-Lasting Manicure
With a bit of practice, you’ll achieve a beautiful and long-lasting manicure, just like at the salon, but from the comfort of your own home.
If you’re dealing with peeling, you might want to consider structured gel manicures – Learn there pros, Cons and cost here.
How to Easily Apply Poly Gel on Short Overlay Nails
When it comes to achieving a gorgeous, professionally finished look for your nails, applying poly gel on short overlay nails can be a bit tricky. However, with the right approach, you can easily reinforce and maintain your natural nails while enjoying a pristine manicure that lasts up to 2-3 weeks. Let me guide you through this process step by step, sharing a bit of my personal experience and tips along the way.
1. Proper Preparation is Key
Before you start applying gel or poly gel, it’s important to ensure your nails are clean and ready. Begin with cuticle care—gently push back your cuticles and trim any excess if needed. I always recommend using a fine-grit buffer to buff your nails lightly, which creates a smooth surface for better adhesion of the gel. Then, cleanse each nail with an alcohol pad to remove any oils and debris. This step is crucial to ensure the poly gel adheres properly and doesn’t lift or peel off easily.
2. Apply the Base Coat
Once your nails are prepped, it’s time to apply the base coat. Start by applying a thin layer of the 12ml base coat and make sure to cure it under an LED Nail Lamp for about 60 seconds. Don’t worry if the base feels slightly tacky after curing—that’s completely normal. This means it’s ready for the next layer of poly gel.
3. Sculpting with Poly Gel
For this step, I prefer using a small amount of poly gel squeezed onto a spatula. You don’t need much—just enough to cover the nail from cuticle to tip. For short nails, I recommend adjusting the quantity to avoid any bulkiness. Start with your thumb and work your way down to the smaller nails, ensuring even application. Here’s a tip: dip your Nail Brush into Slip Solution to help you sculpt and smooth the gel over your nail without it sticking too much. Be sure to press the gel gently towards the cuticle and along the sides of the nail without letting it touch the skin.
4. Curing the Poly Gel
Once you’ve shaped the poly gel to your liking, it’s time to cure it under the LED Nail Lamp. I suggest curing one nail at a time to prevent the gel from settling or getting uneven. Each nail should be cured for 60 seconds. This will help the poly gel bond firmly to your natural nails and ensure a smooth, durable finish.
5. Apply the Second Layer if Needed
If you notice any sparse areas or spots that need more coverage, don’t worry. Simply apply a second layer of poly gel to those edges and sparse areas and cure again. This ensures a seamless, sculpted look across all your nails.
6. Smooth and File the Surface
After curing, take a nail file to smooth any rough spots or edges. Gently remove the filing dust using an alcohol pad. This helps to create a smooth and even surface, which is crucial for the next step.
7. Top Coat for a Glossy Finish
Once the nails are smooth and dust-free, it’s time to add the no-wipe top coat. Apply a thin layer of top coat and cure it again under the lamp. This will give your nails a glossy finish, making them look shiny and flawless. If you want a little extra sparkle, you can always apply a layer of gel polish over the base coat for added color and shine.
8. Nourish Your Cuticles
Finally, after everything is set and done, don’t forget to nourish your cuticles with some oil. This step is important to keep your nails hydrated and healthy. I always end my routine by massaging in the oil to keep my nails feeling strong and looking gorgeous.
By following these steps, you can easily achieve a pristine and long-lasting poly gel manicure on your short overlay nails, all while promoting growth and strength.
Final overview
When applying gel on short nails, it’s all about finding the right techniques to make your nails look polished and chic without any hassle. Start by ensuring your natural nails are clean and dry, then follow a tutorial to guide your application process. Using Poly Nail Gel or semi-cured gel wraps is a perfect solution for short fingernails, as they protect your nails, strengthen them, and create a protective barrier that encourages growth while also preventing damage.
These wraps come in beautiful shades, and whether you prefer a minimalist nail style or want a bit of creative flair, they offer flexibility and durability for long-lasting results. Take care in applying the gel to ensure a smooth finish, and you’ll enjoy a fabulous manicure every time. These flexible gels are easy to work with, making it simple to achieve a healthy, stronger look for your short nails.
FAQS
Can you put gel nails on really short nails?
Yes, gel nails can absolutely be applied on really short nails. The application process is just like applying gel on longer nails, and it can actually help make your short nails look shiny and well-groomed. A gel manicure can even enhance the appearance of your nails, giving them a polished, well-groomed look, even if they’re short. With gel polish, you don’t need long nails to enjoy a beautiful and shiny finish.
How to gel paint short nails?
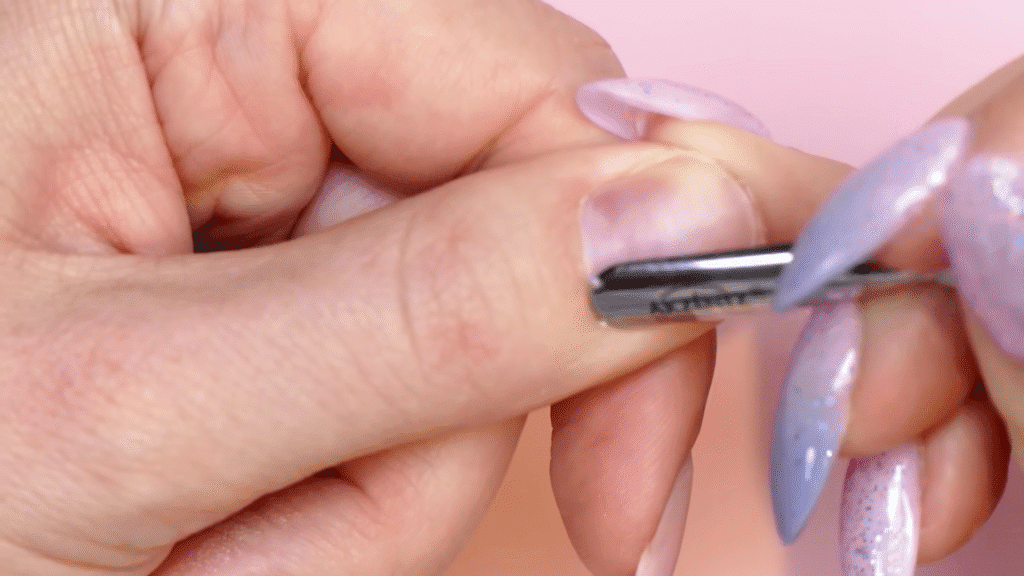
When applying gel paint to short nails, start by preparing the nail plate properly. First, gently push back the cuticles using a Woodstick or metal Cuticle Pusher. This will create more space for the gel to adhere smoothly. Once your nails are ready, apply a thin coat of gel and cure it under a UV light. Make sure the gel is applied evenly, ensuring a shiny and polished finish. Even with short nails, following these steps will help you achieve a neat, beautiful result that lasts longer.
Can you put fake nails on really short nails?
Yes, you can apply fake nails even on really short nails. While it’s often recommended to let your natural nails grow a bit longer, many technicians have special techniques that can work on short nails. They can still apply fake nails successfully, giving you that beautiful and polished look, but it’s always best to consult with a professional for personalized advice to get the best results.
Is poly gel good for short nails?
Yes, Polygel is a great option for short nails. It’s lightweight, strong, and provides excellent results without causing lifting or breakages. When working on short nails, you only need a small amount of product, making it easier to manage and apply. The minimal filing required means you can finish quickly while still getting a clean, durable finish. Polygel ensures your nails remain strong, making it an ideal choice for short nails looking for a polished look.
What is poly Gel overlay?
A Polygel overlay is when you apply Polygel directly over your natural nails to create a strong, durable layer that enhances the appearance of your nails. It can be used to give a polished look without the heaviness of acrylic or gel. This overlay is lightweight, flexible, and can be cured under a UV light. It provides an excellent nail enhancement while still allowing the natural nails to breathe and grow.